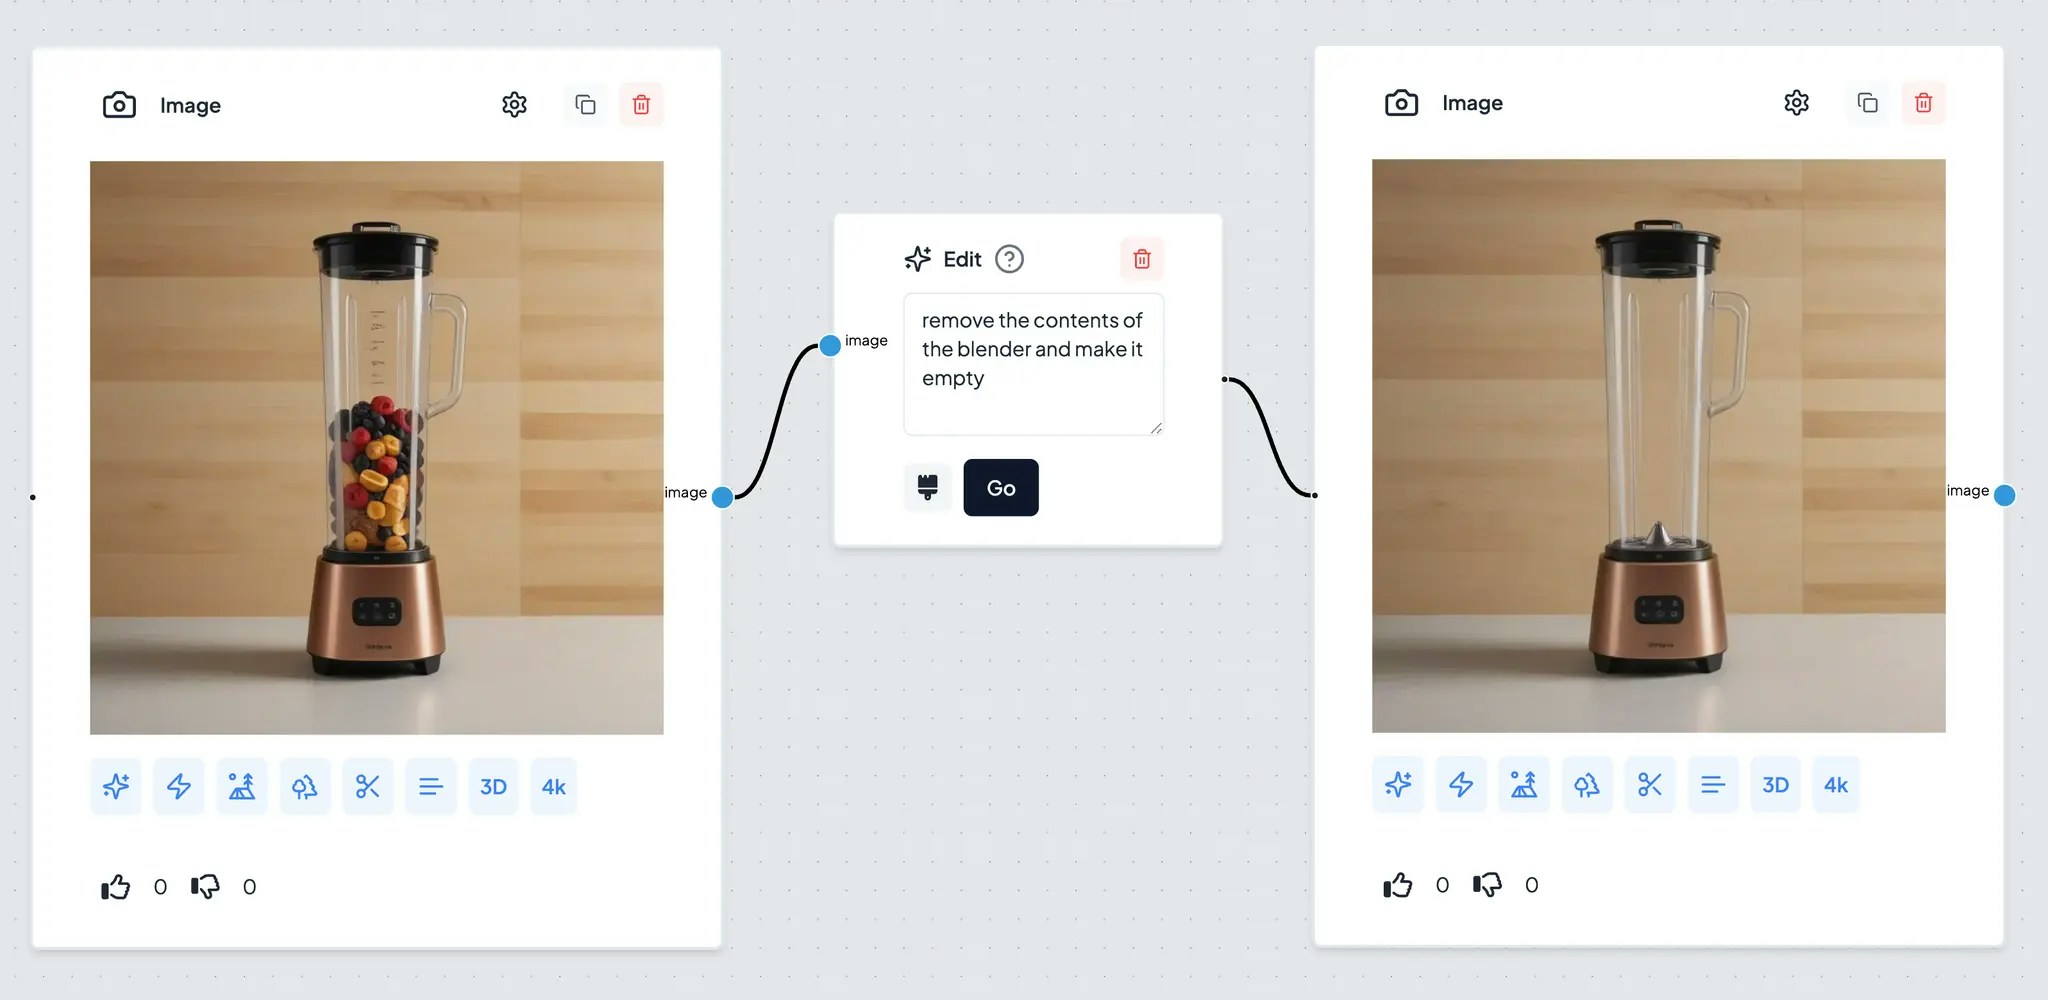
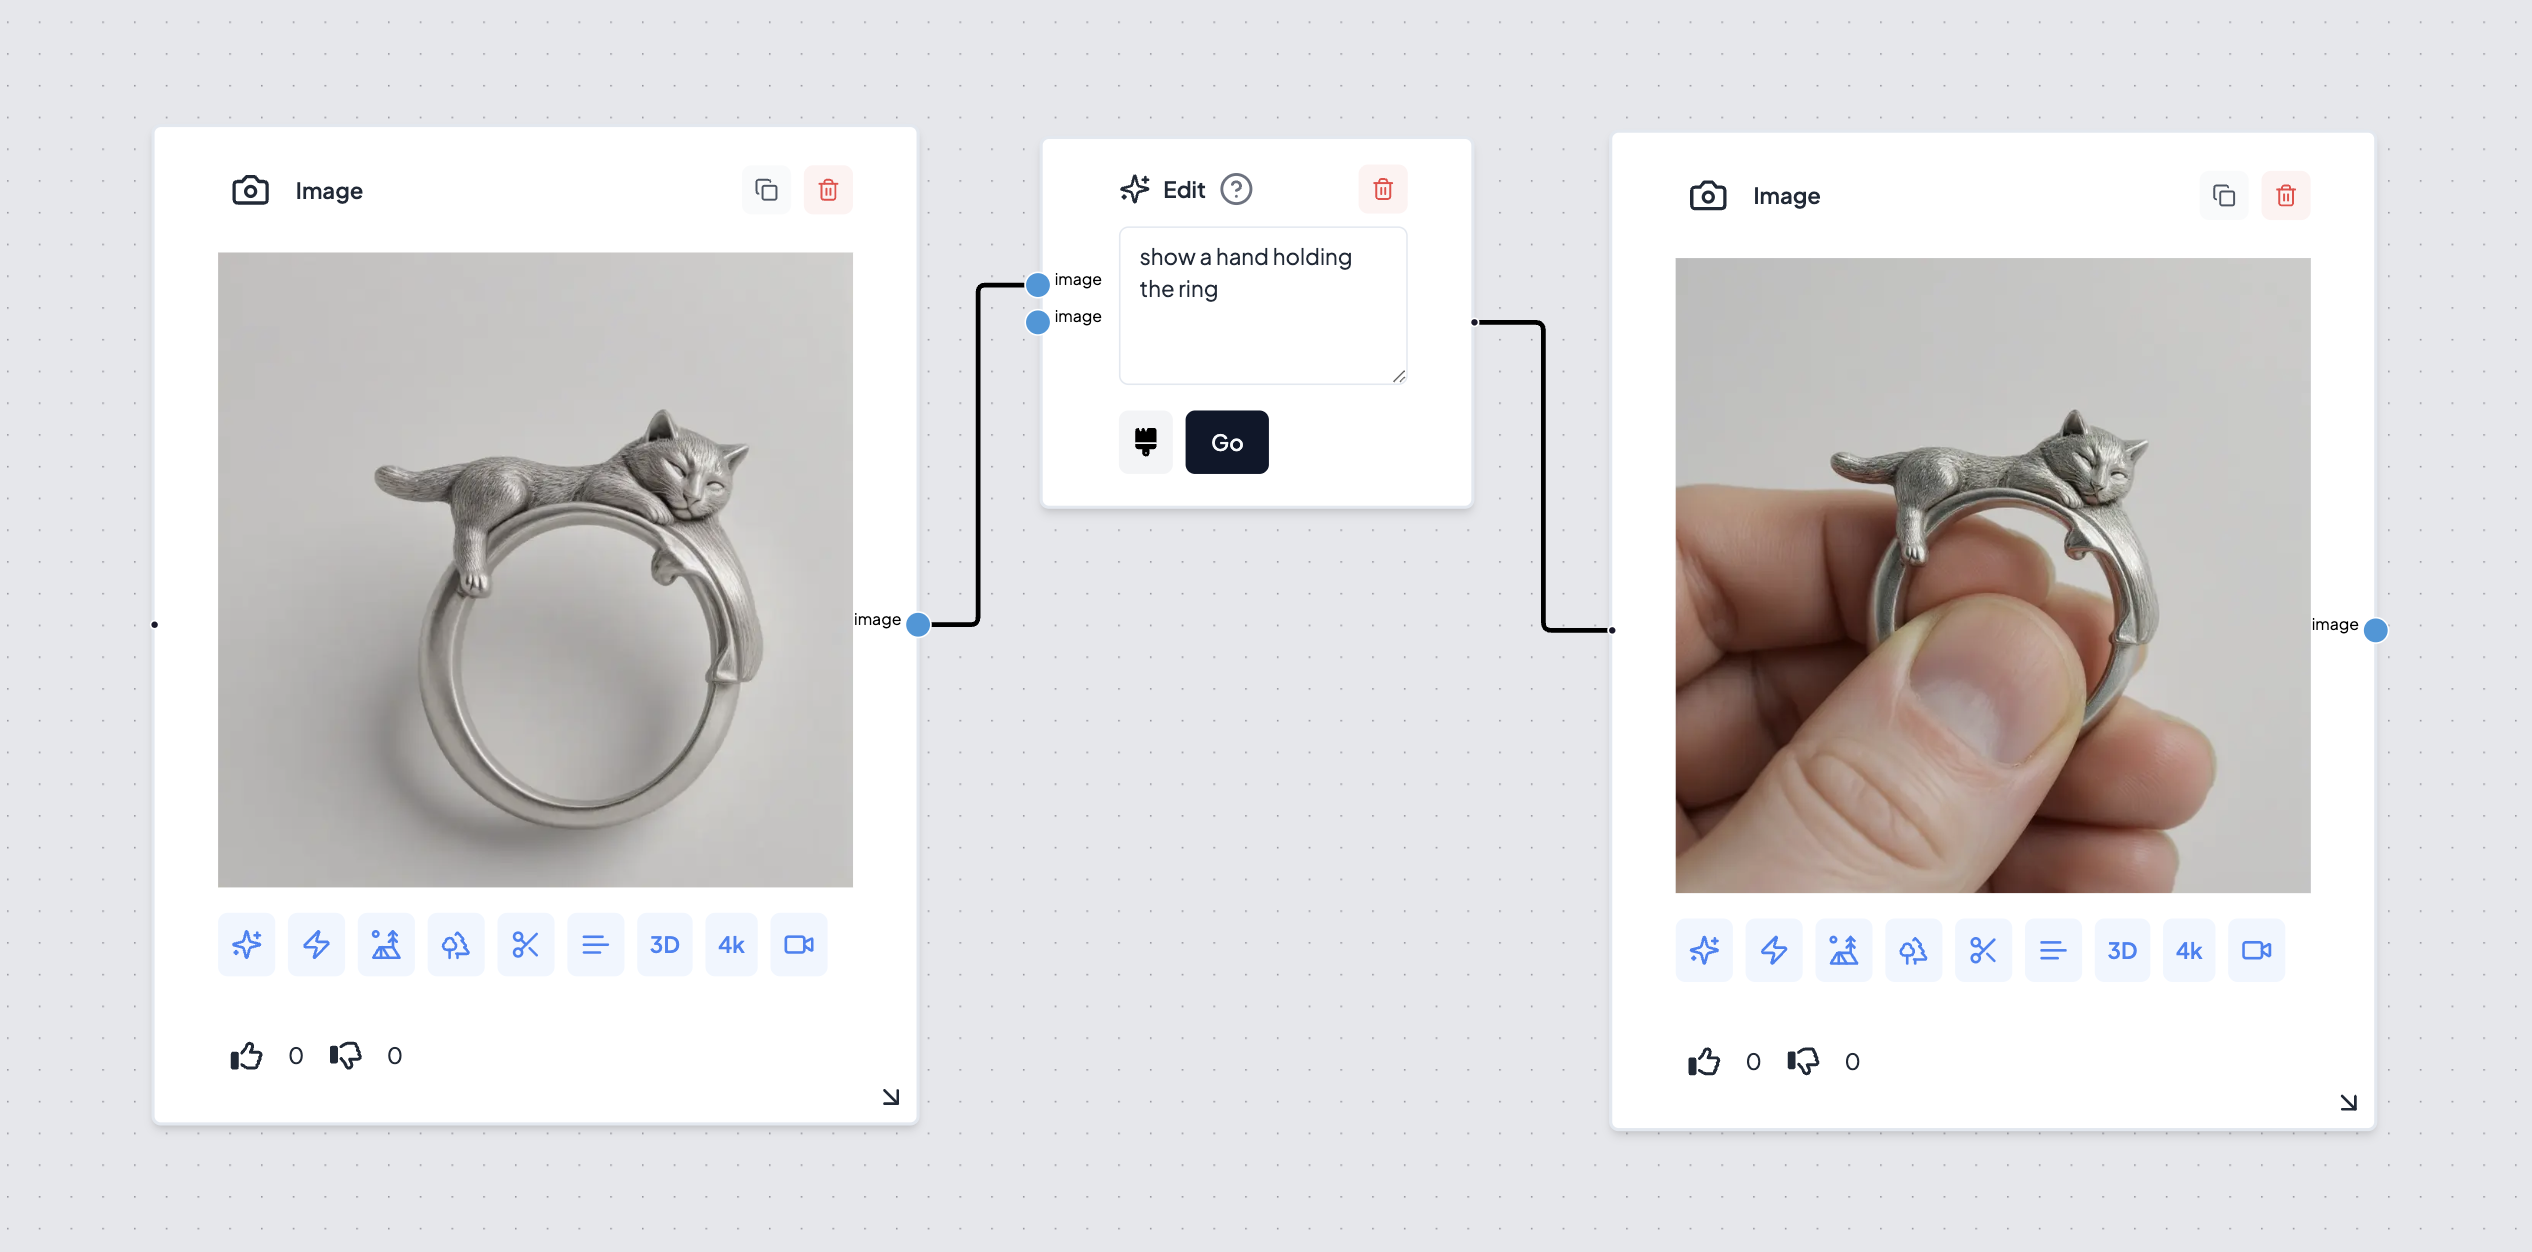
Simply describe what you want to change or modify in the image using natural language—for example, “keep everything the same but make the background blue” or “add a label with the text “Max” to the top right corner.”
The node will interpret your instruction and update the image accordingly, making it a flexible tool for a wide range of edits, from subtle adjustments to major changes.
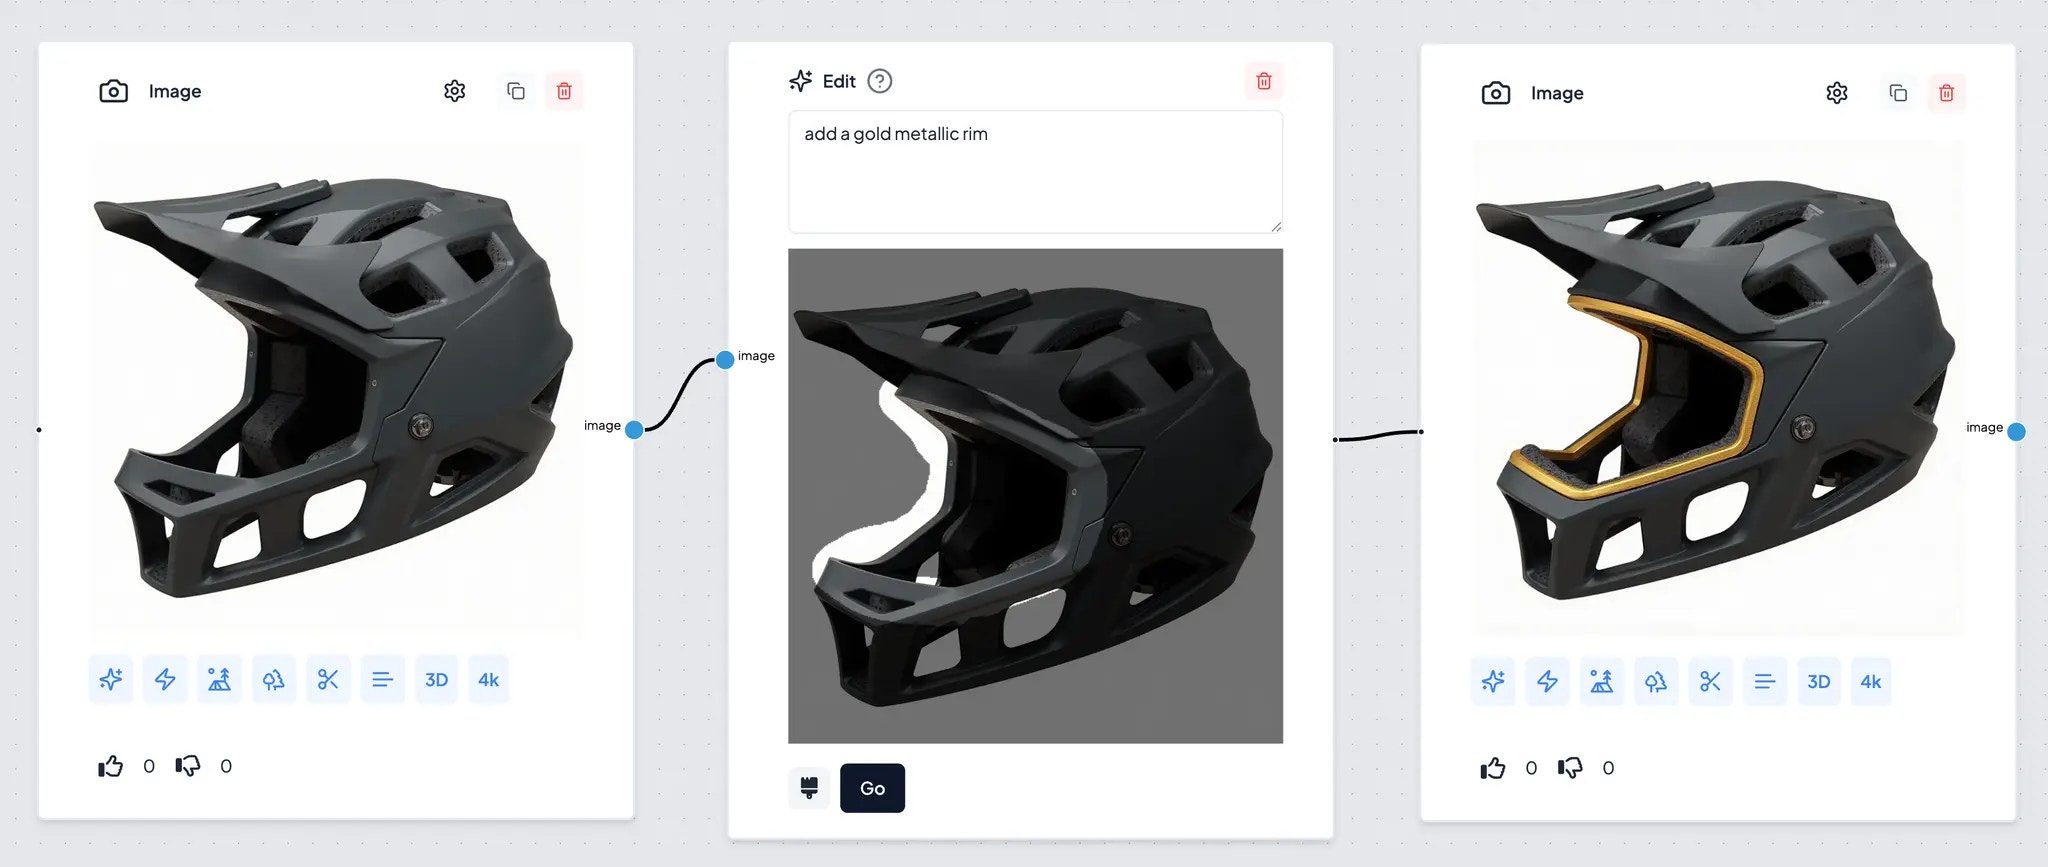
Tip: The more specific your instruction, the better the results. You can use this node for creative edits, corrections, or enhancements based on your needs. You can also provide a mask to edit specific regions of the image:
Use Edit node to create different views of the product
Once you have a design, you can connect it with an Edit node, describe the camera angle you want to see the design at, then hit Go.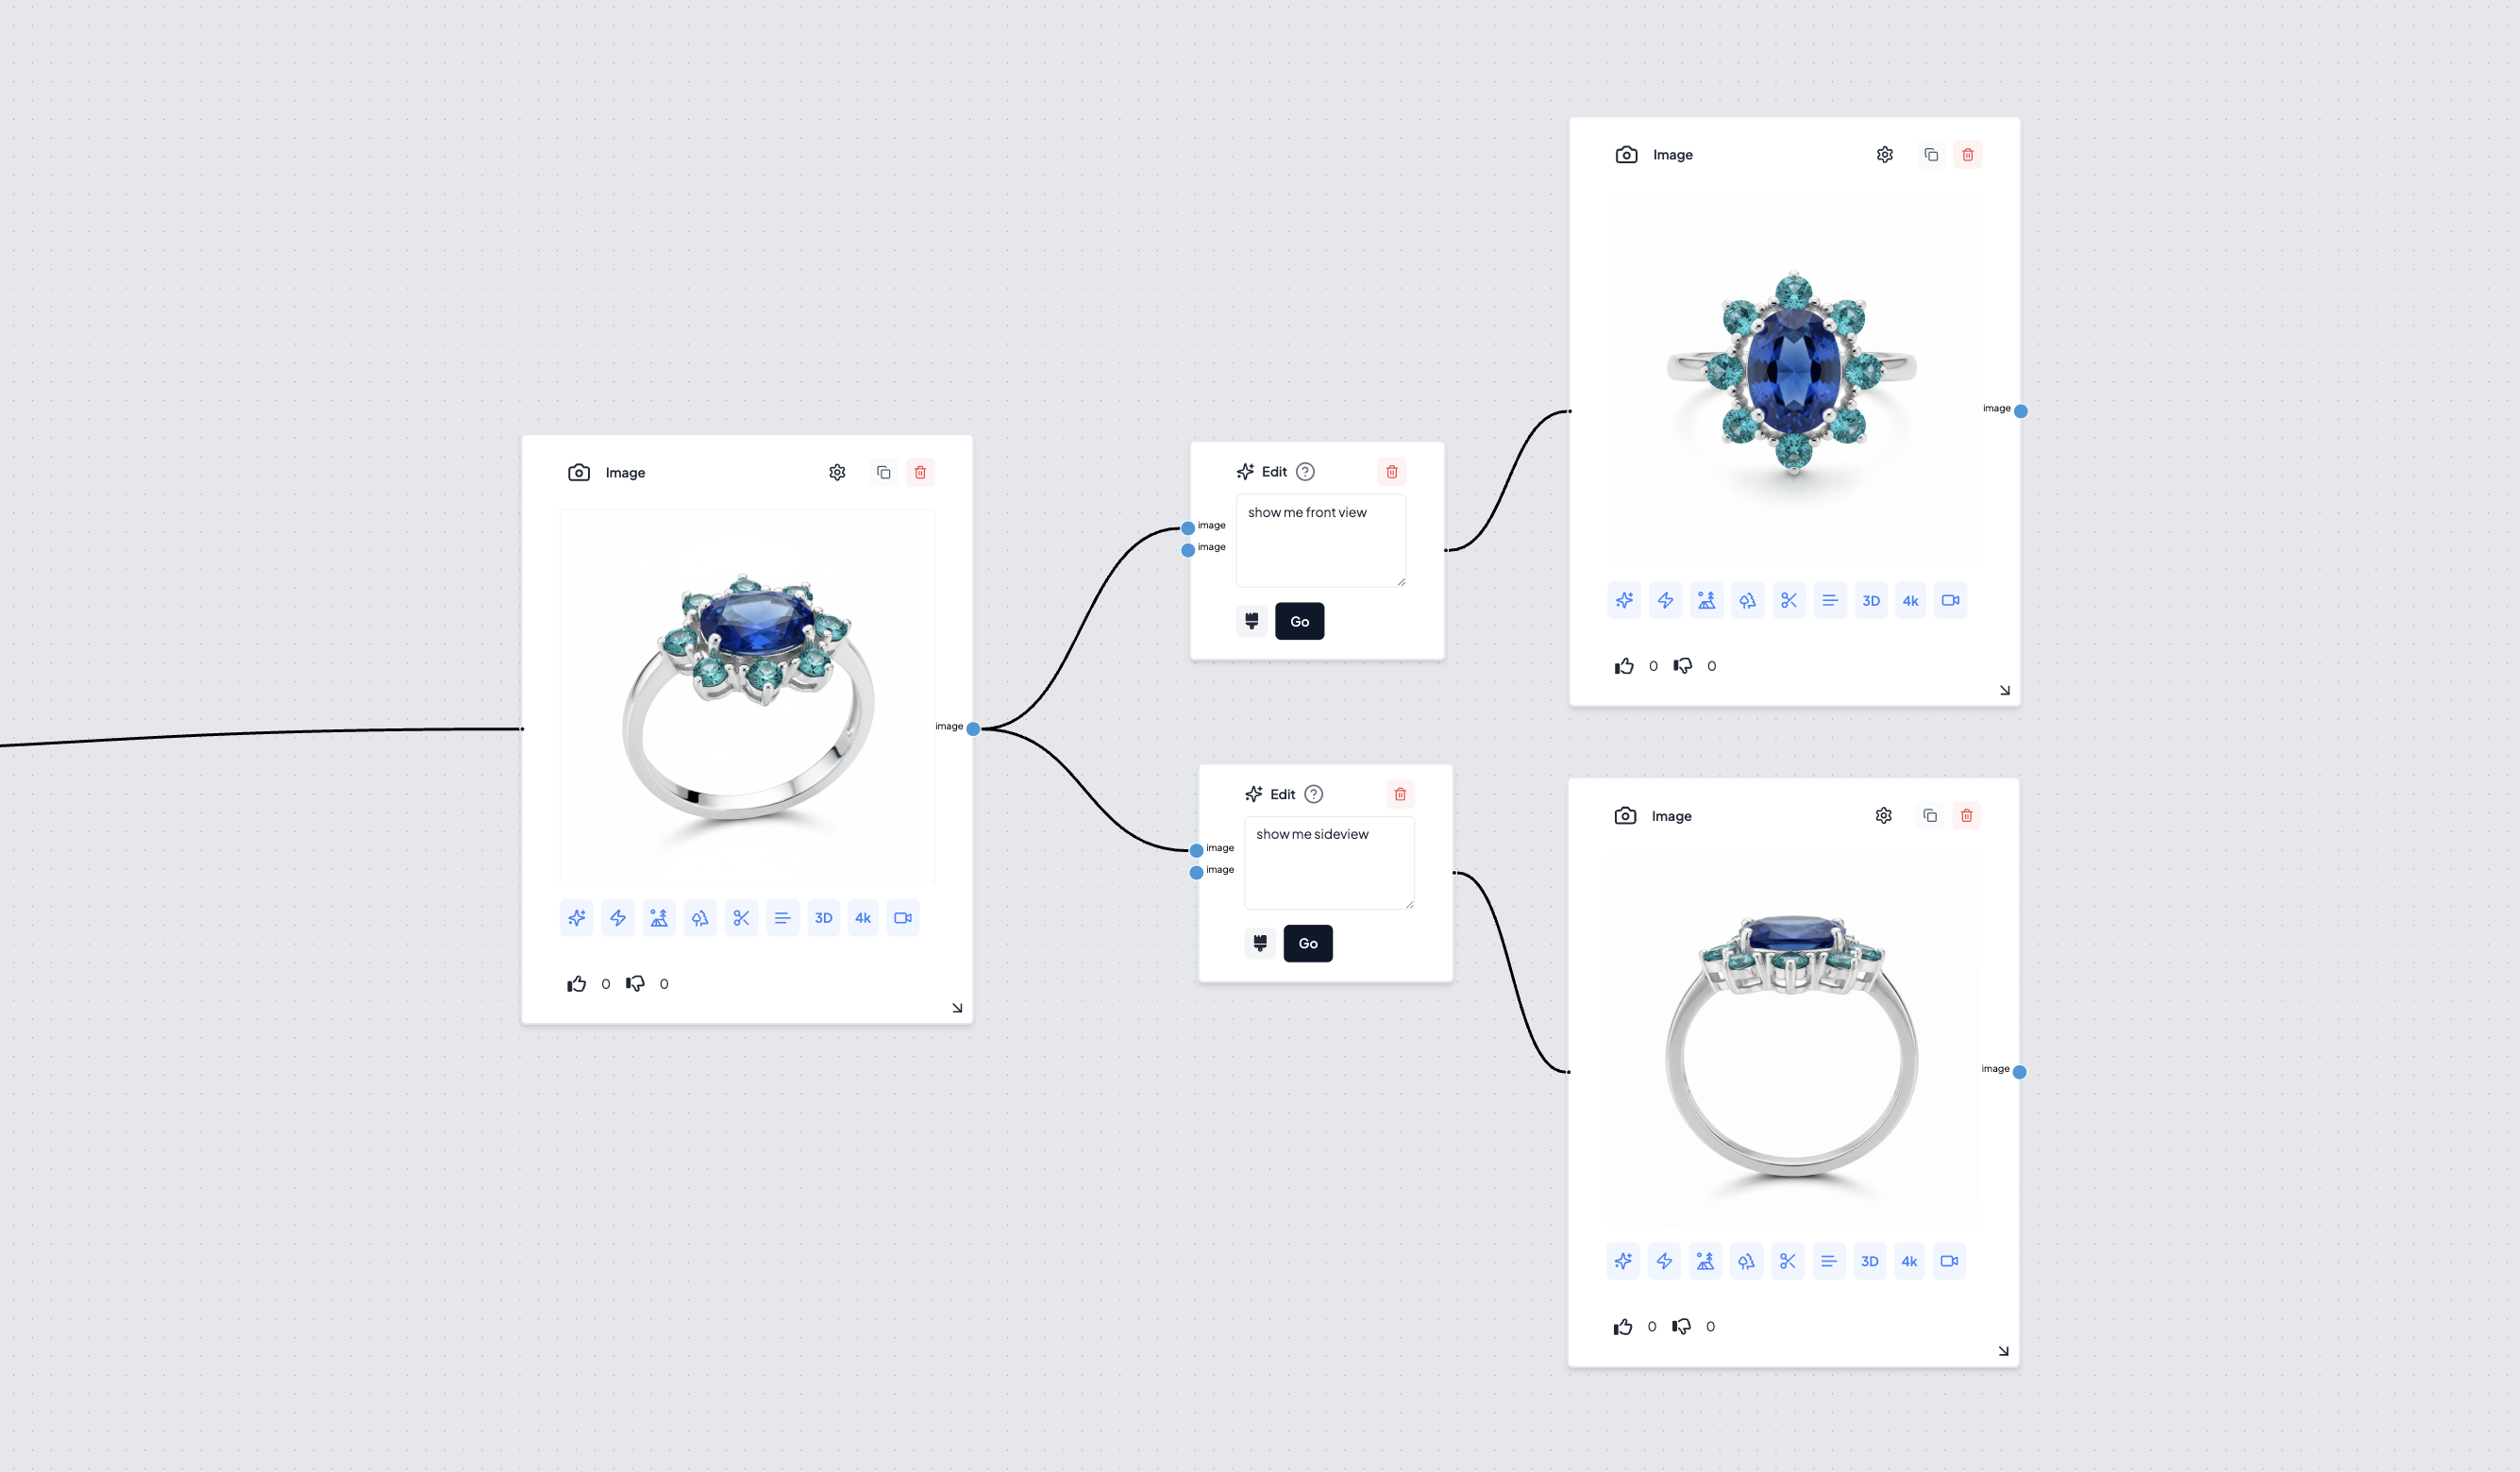
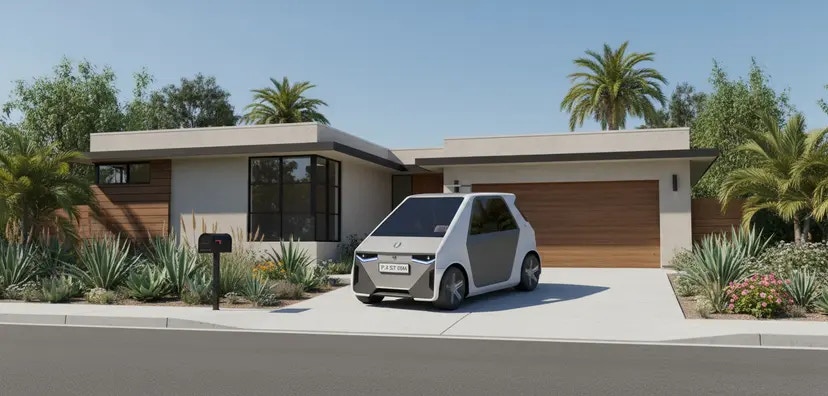
Use Edit node to create background
Example 1: Creating a scene for a vehicle design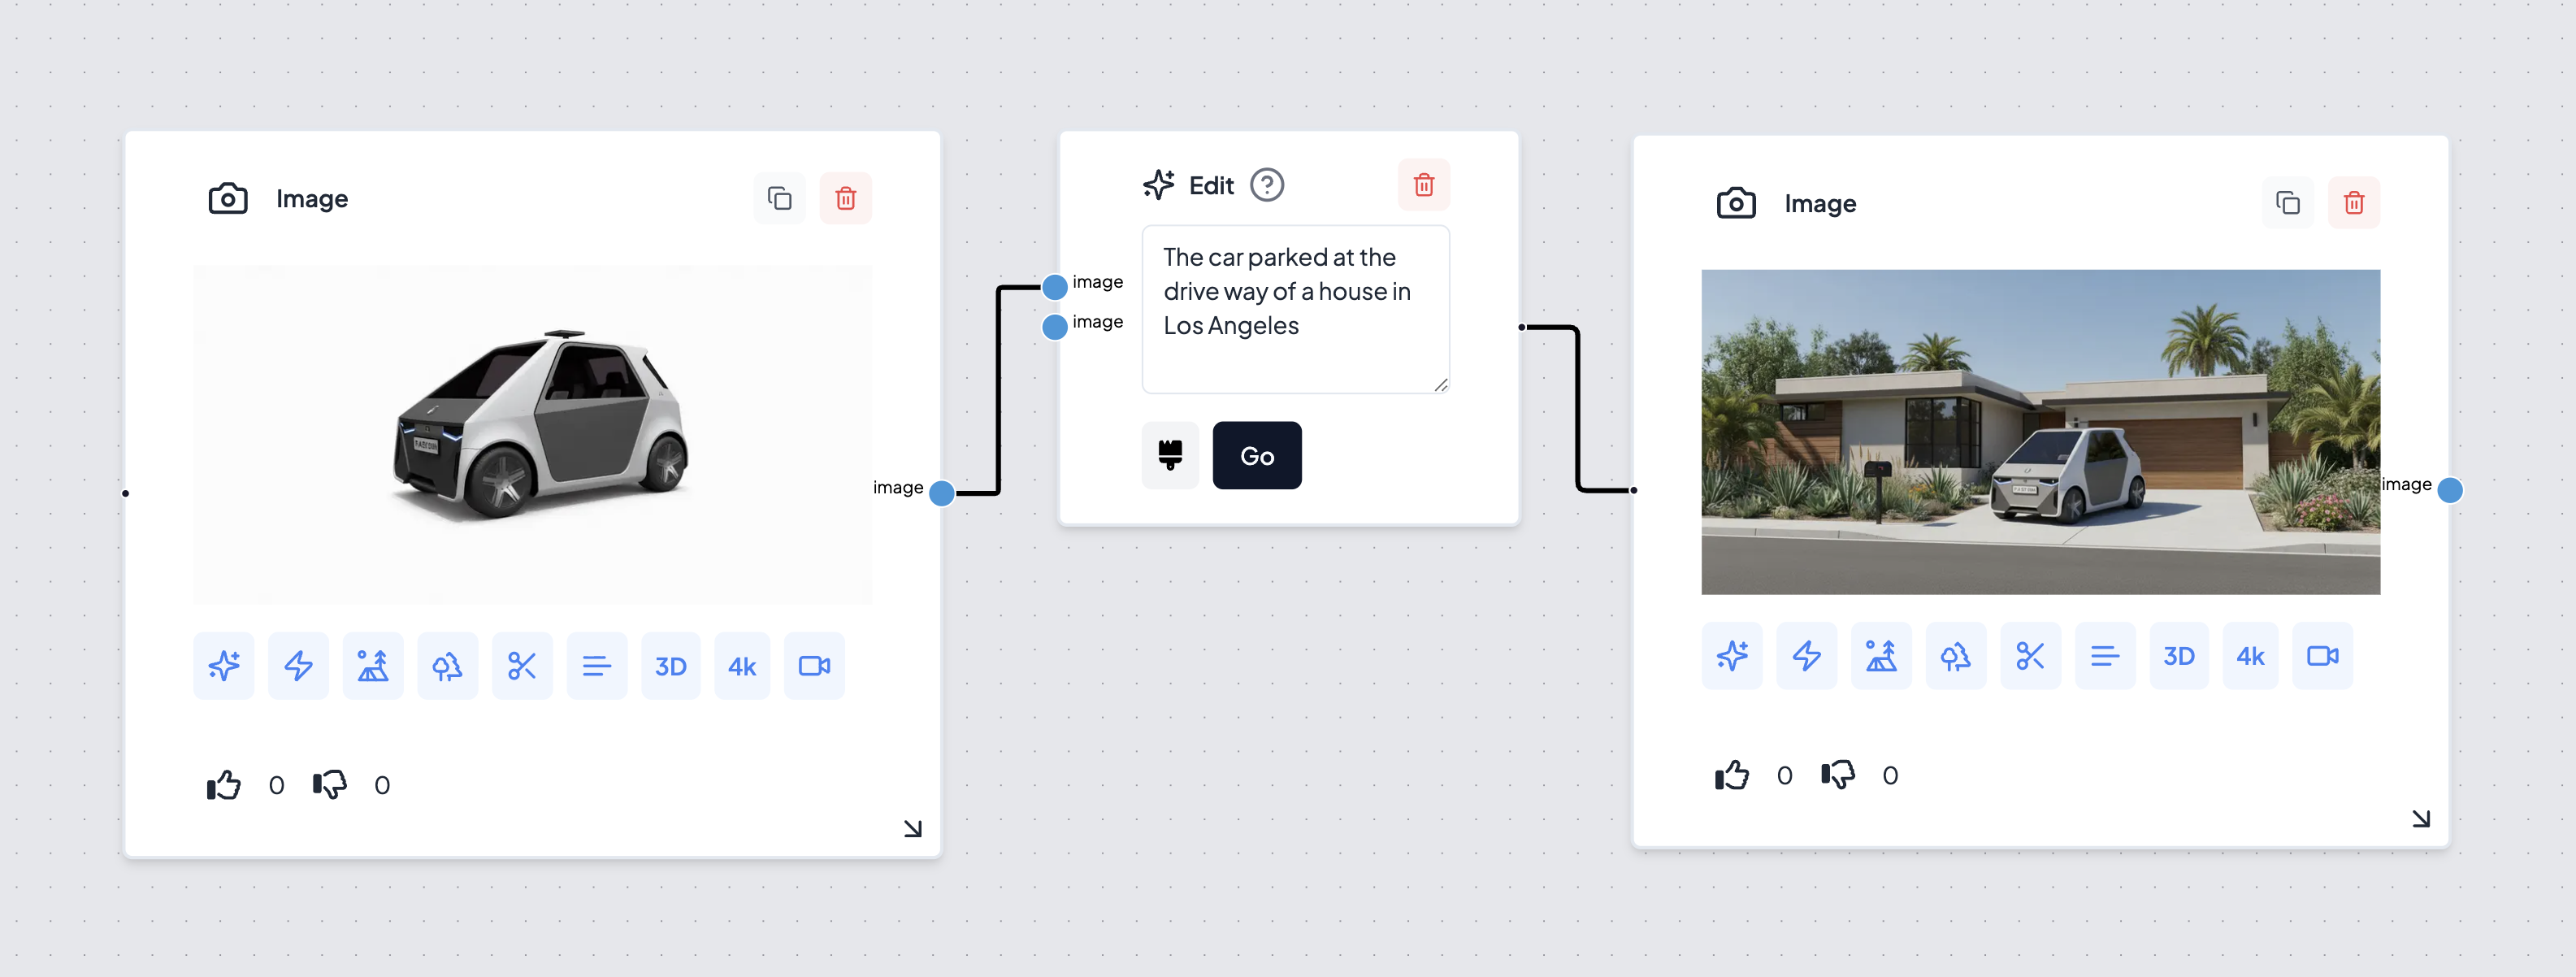
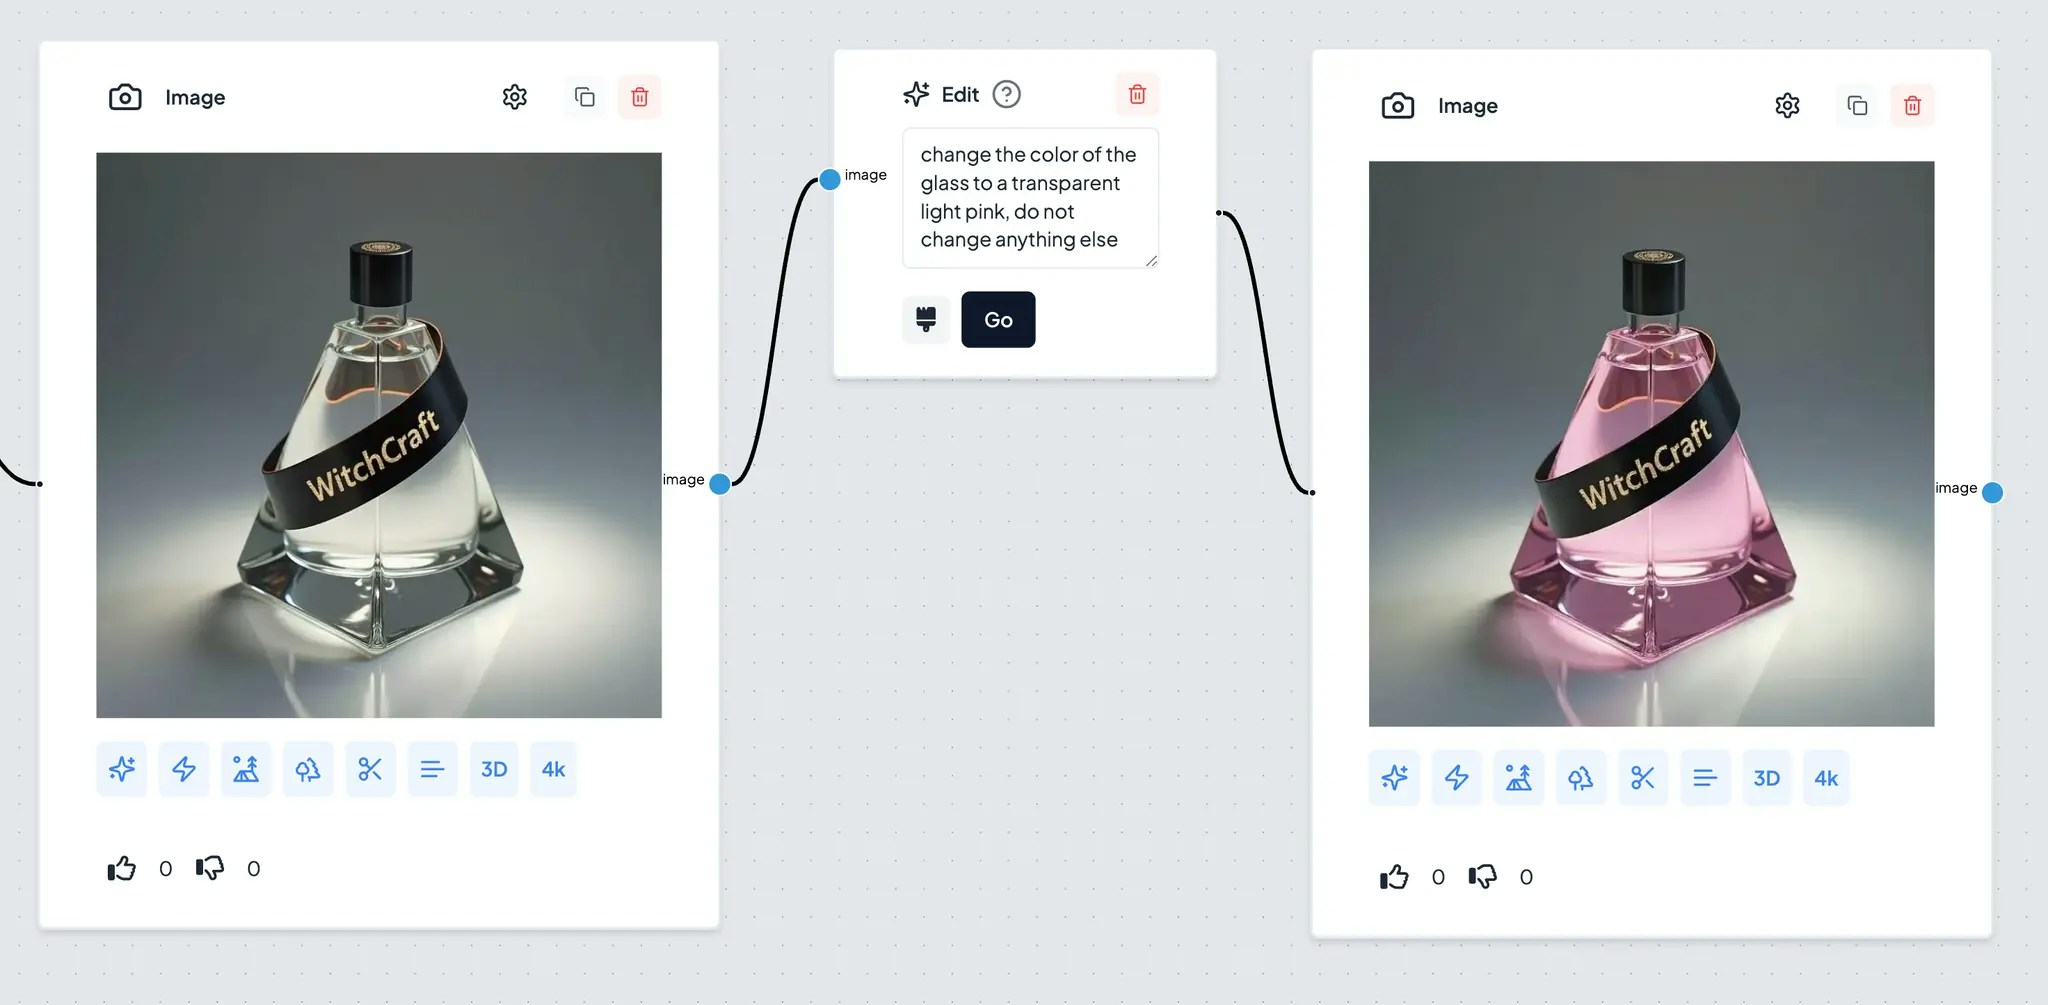
Use Edit node to change color & material and finish of a product
Example: Footwear CMF (Colors, materials & Finishes)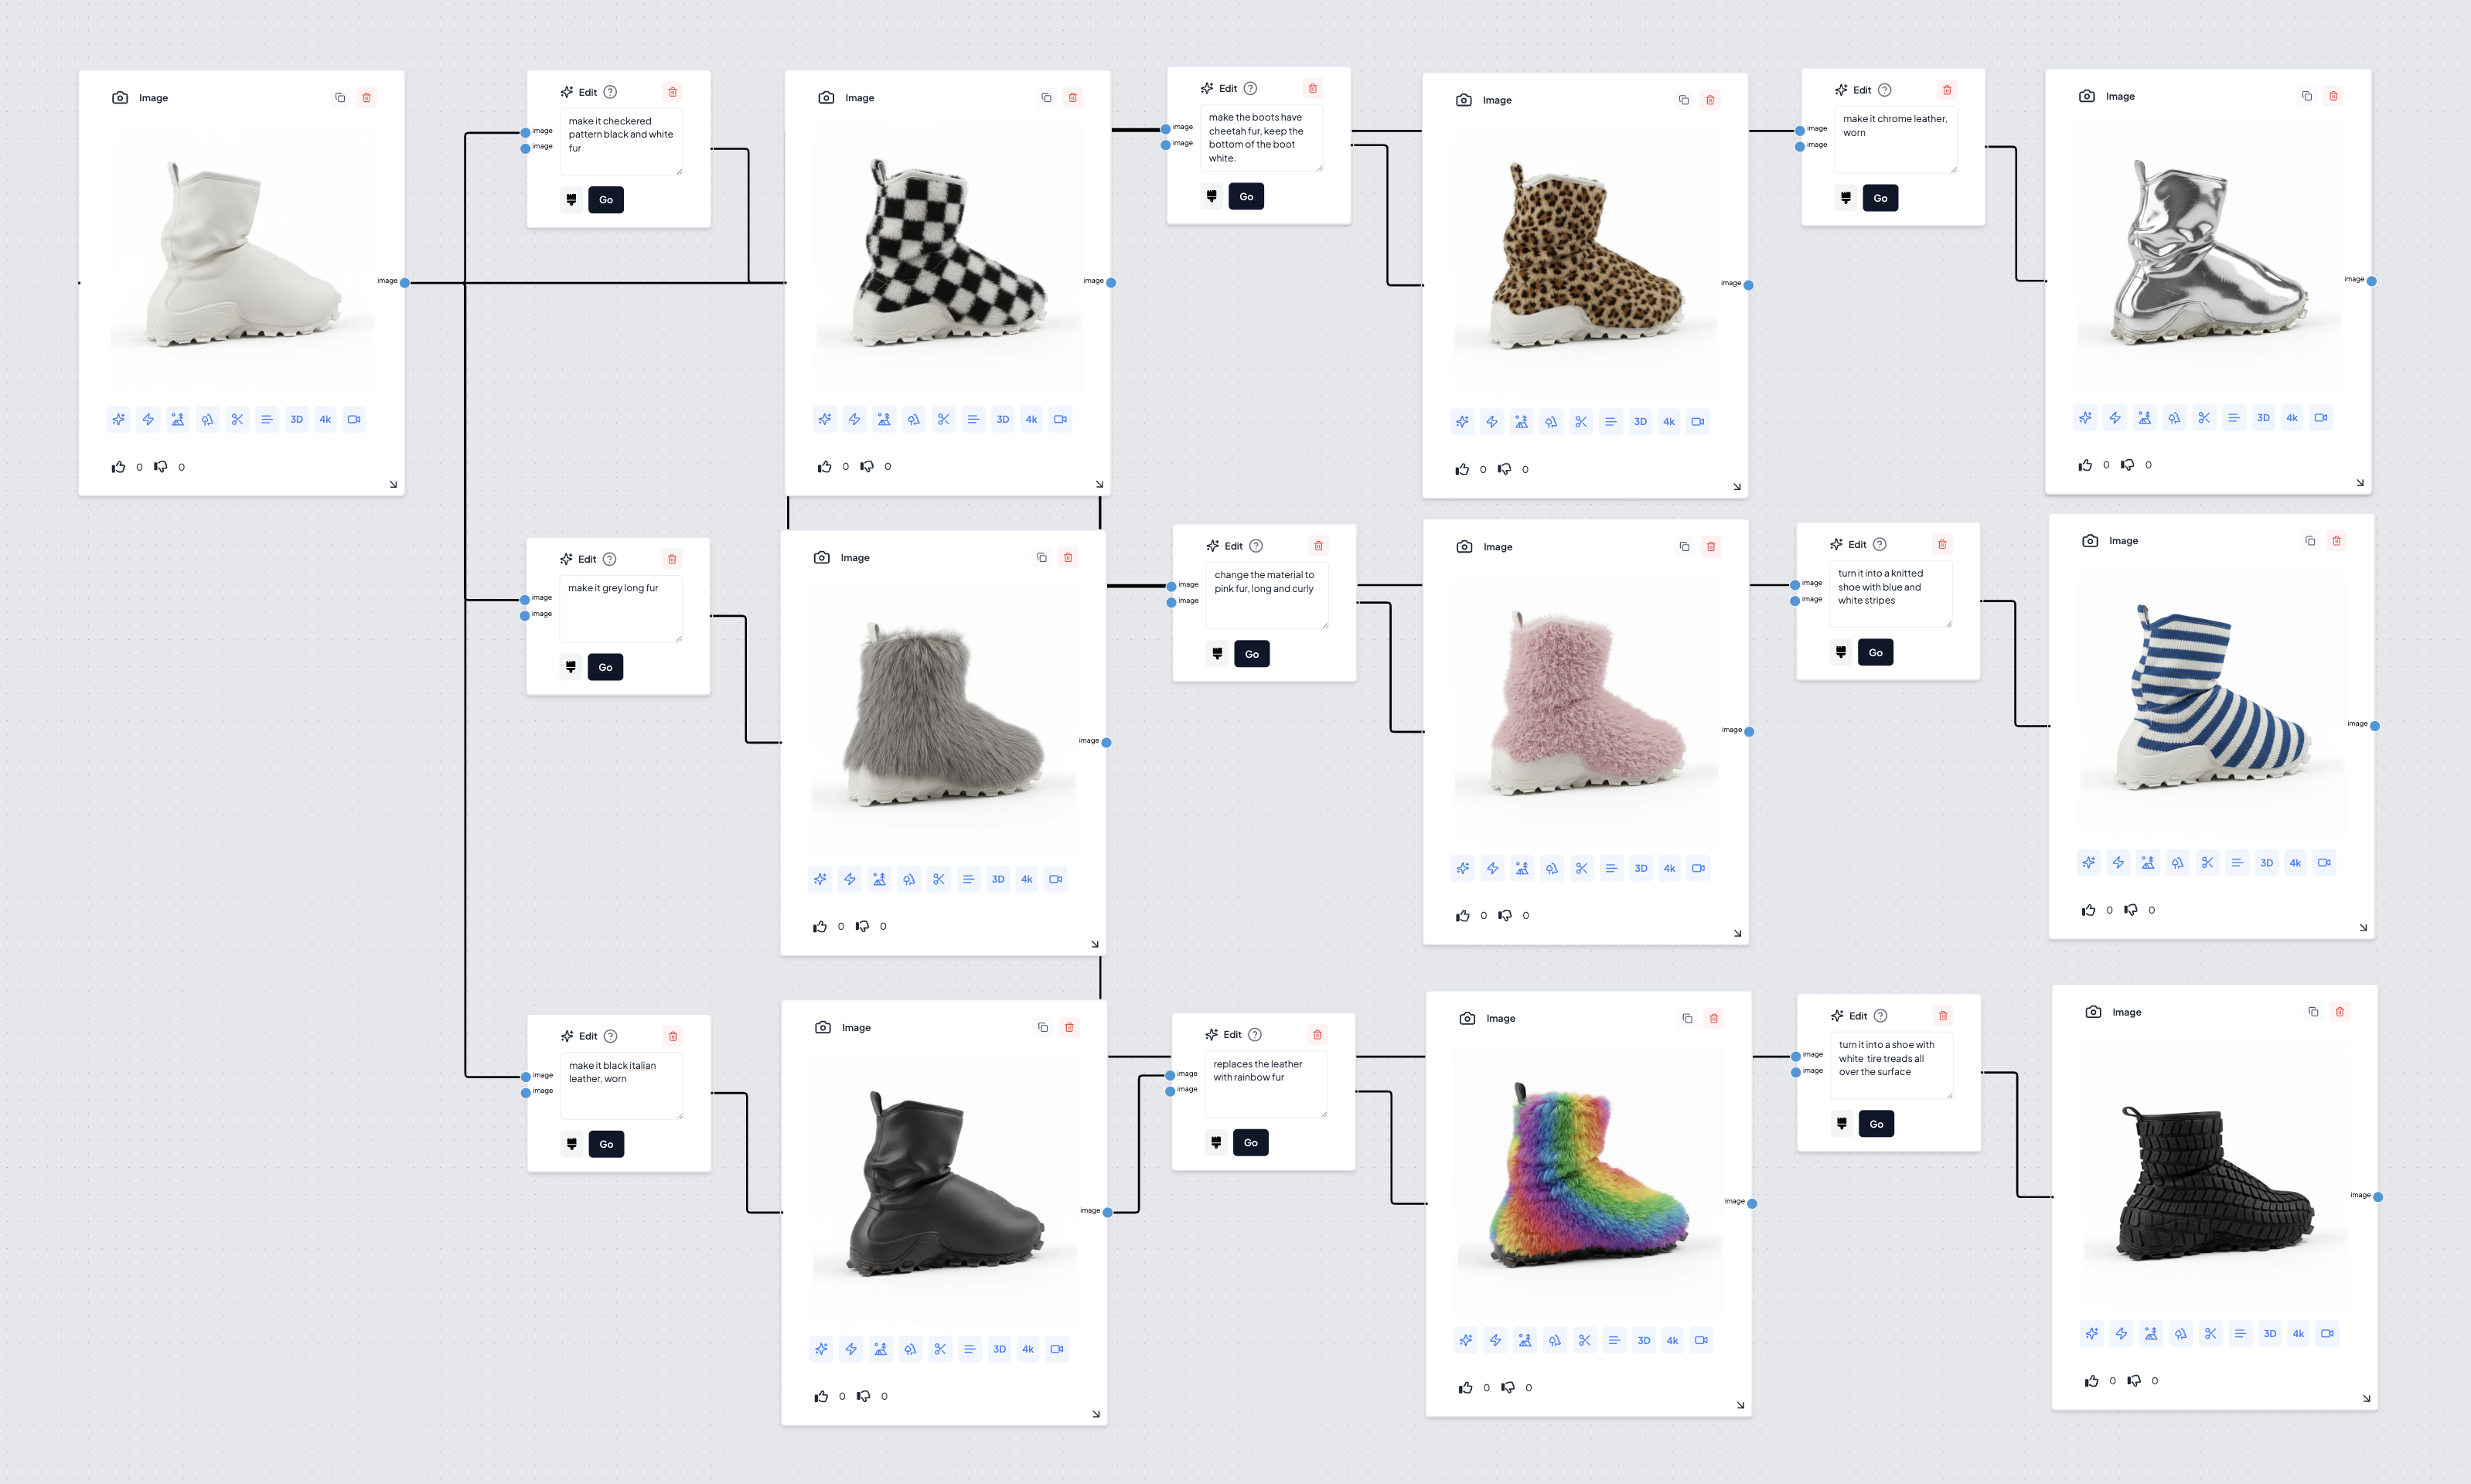
Use Edit Node to change product categories, while keeping the design language
Example: Footwear Design (category changes)